Search

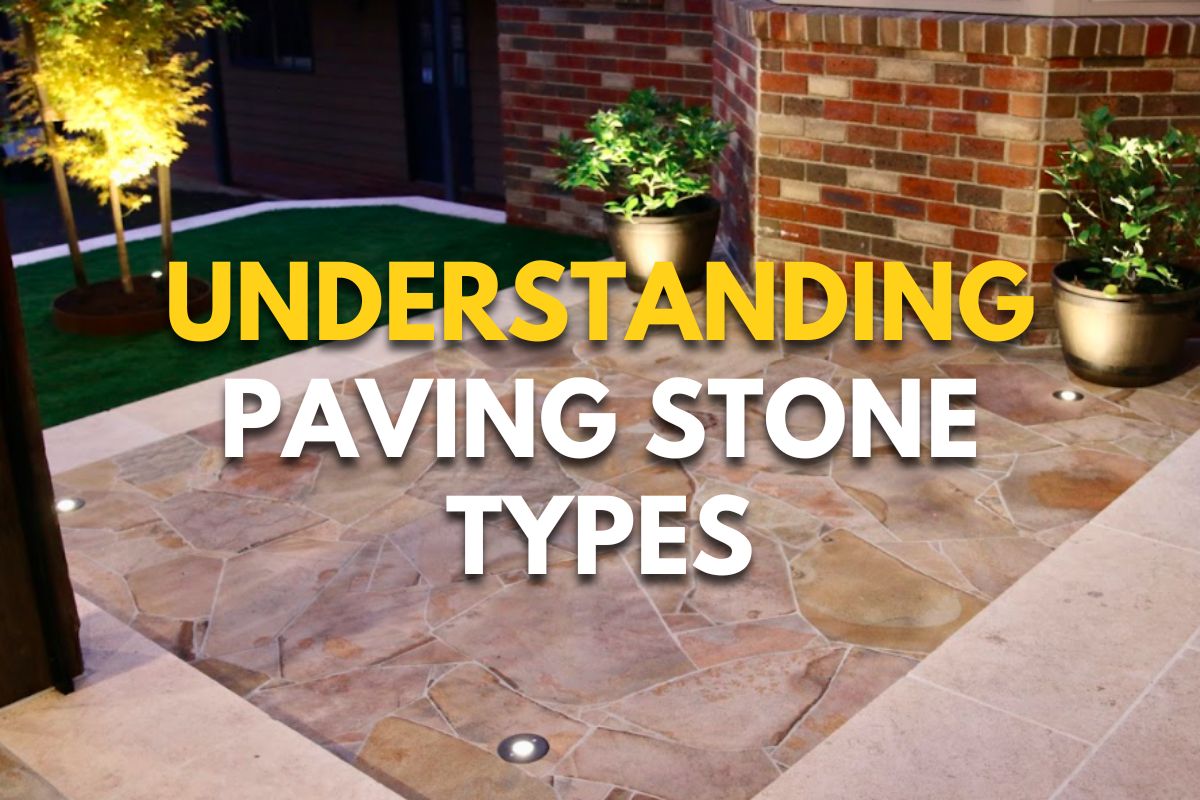
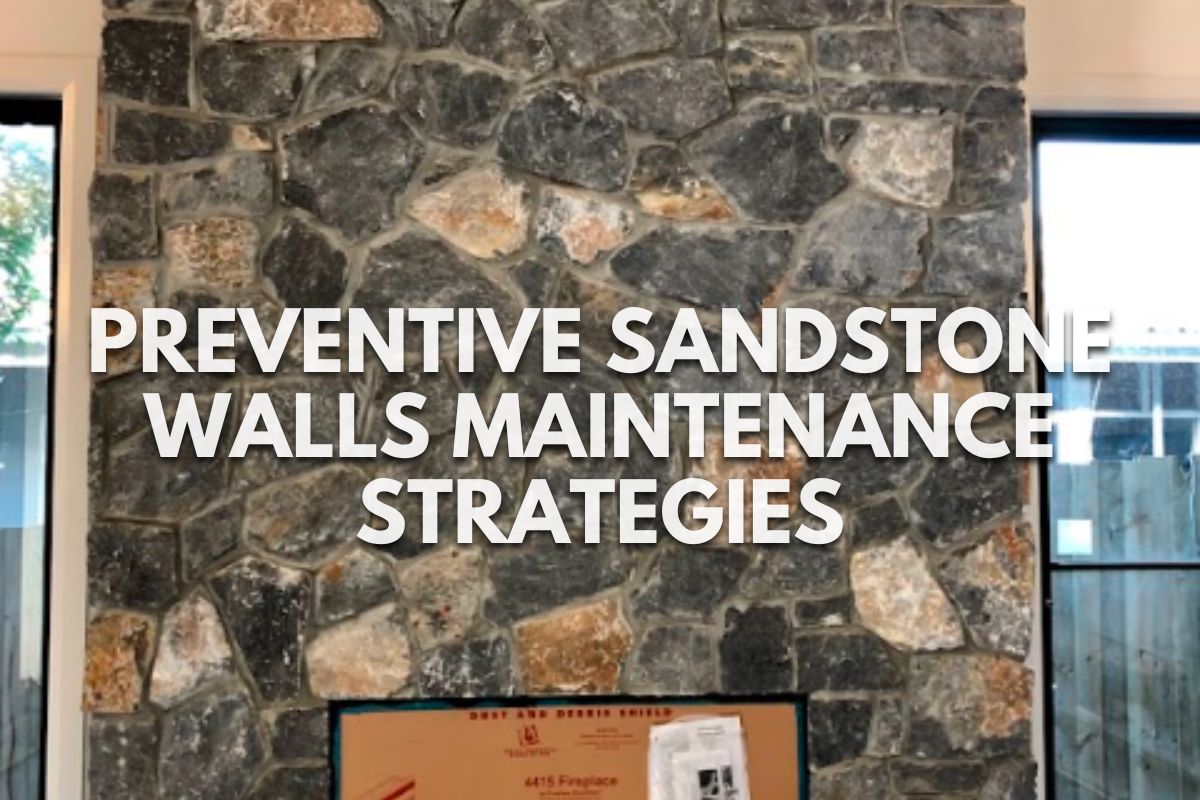
Best Stirling Sandstone Suppliers in Adelaide

Selecting the right sandstone supplier in Adelaide can be challenging, with quality and service levels varying significantly.

Inconsistent stone quality and unreliable delivery can derail even the most meticulously planned construction projects, causing delays and increased costs.

This article provides a curated list of the best Stirling sandstone suppliers in Adelaide, known for their exceptional quality and dependable service. Whether you’re renovating your home or embarking on a new construction, these suppliers will ensure you get the best materials for your project.

Factors to Consider When Choosing Sandstone Suppliers

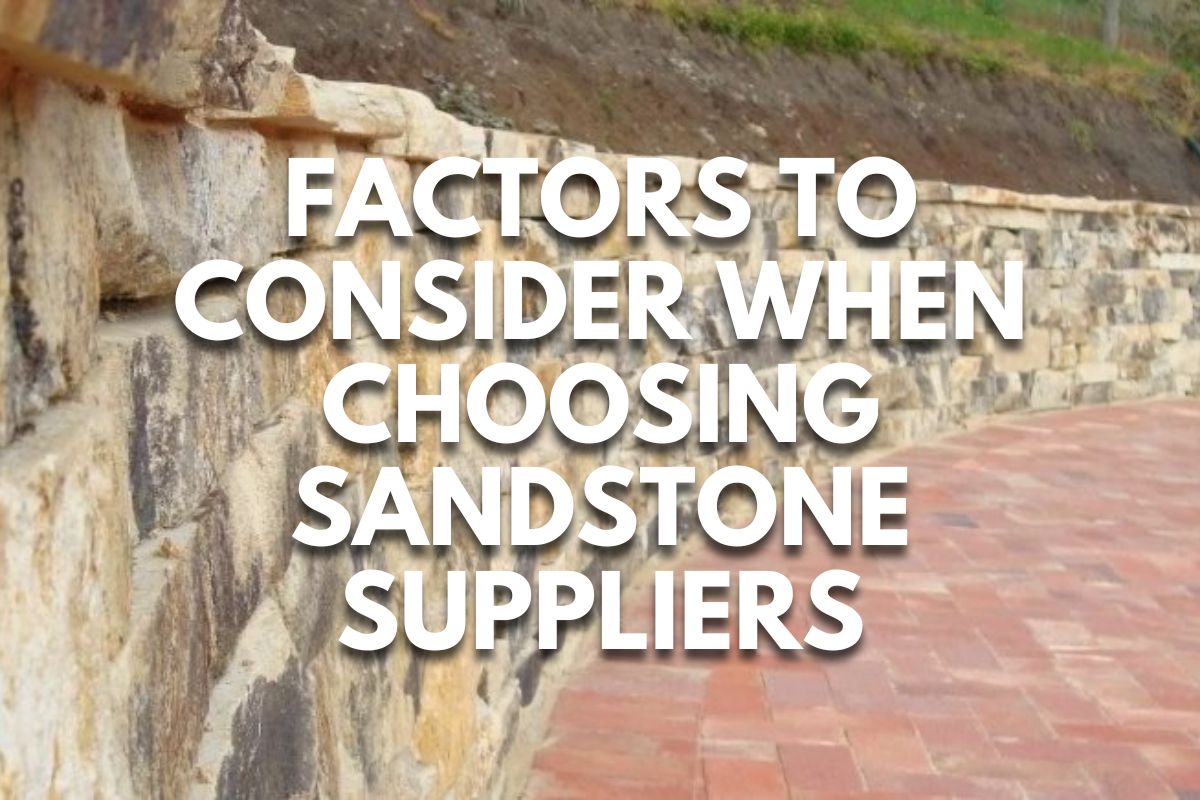
When selecting a sandstone supplier in Adelaide, consider these essential factors to ensure you receive high-quality materials and reliable service:

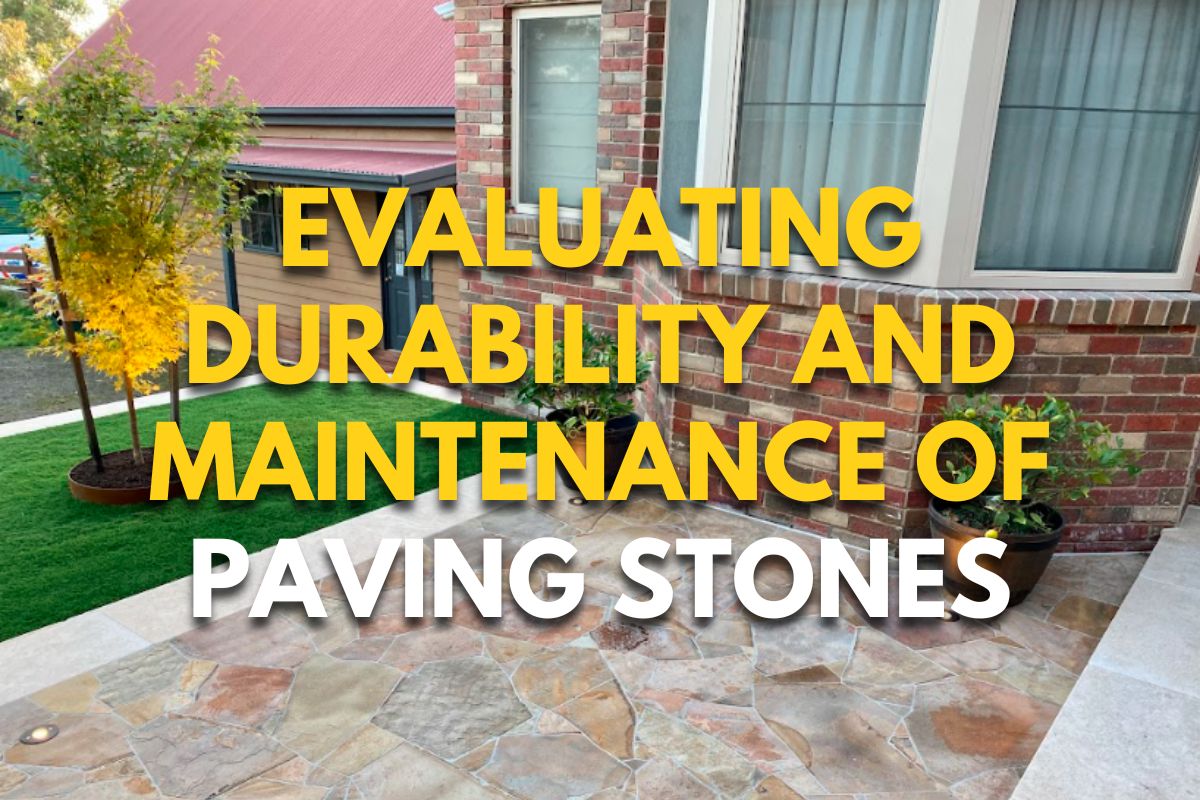
  • Quality of Stone: Assess the uniformity of the stone’s color and texture, and check for any defects like cracks or irregularities. Visiting the quarry or requesting samples can aid in evaluating the quality.
  • Range of Options: Choose suppliers that offer a variety of sandstone types and finishes, providing more flexibility to match your project’s specific requirements.
  • Reputation and Reliability: Investigate the supplier’s market reputation through reviews, testimonials, and examples of previous projects to gauge their reliability and customer satisfaction.
  • Customer Service: Ensure the supplier offers excellent communication and support throughout the selection and delivery process.
  • Delivery Capabilities: Verify the supplier’s ability to deliver on schedule and their logistics support, ensuring they align with your project’s timeline and location.
  • Pricing: While comparing costs, consider the overall value offered in terms of quality and service. Opt for the best balance between cost and the benefits provided.

Review of Top Stirling Sandstone Suppliers in Adelaide

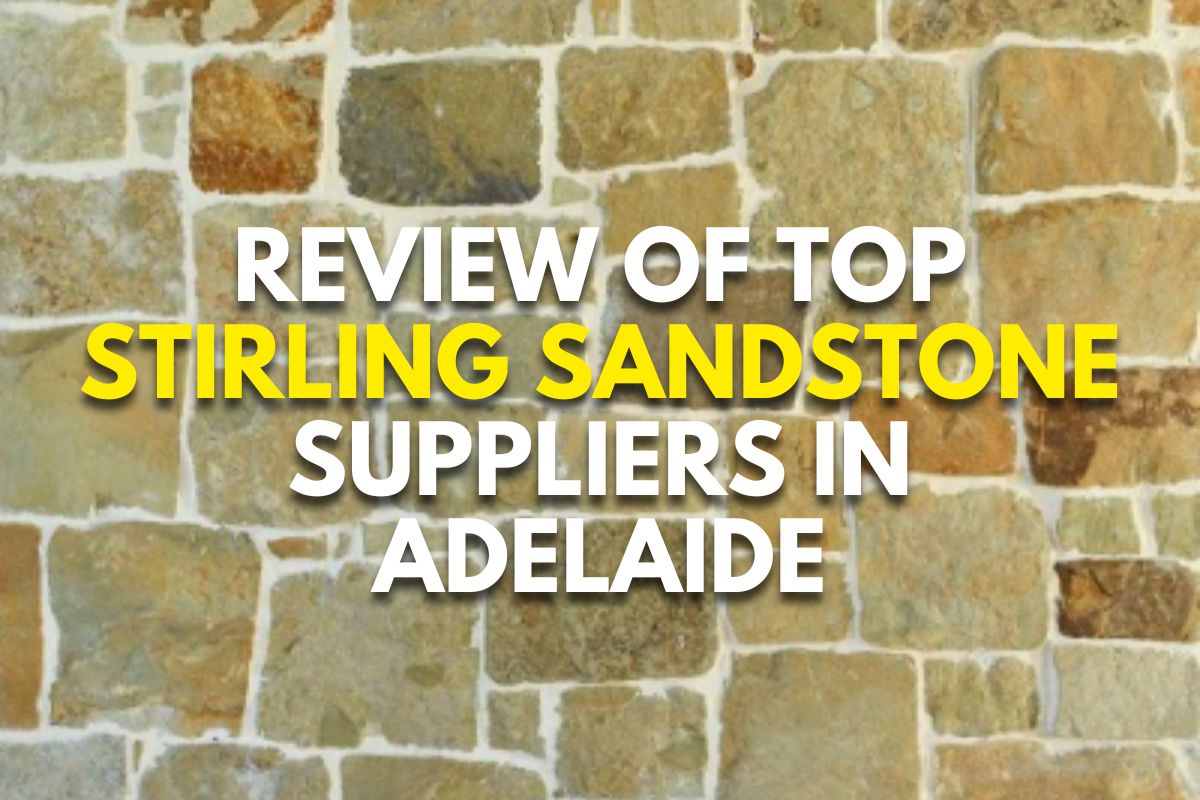
Here’s a more detailed breakdown of each key aspect concerning the top Stirling sandstone suppliers in Adelaide:

  • Quality of Sandstone:
    • Durability: Suppliers are selected for offering sandstone that withstands harsh weather conditions and wear, making it ideal for long-lasting structures.
    • Aesthetic Consistency: The stone features uniform colors and textures, important for projects where visual appeal is a priority.
  • Range of Products:
    • Versatility: Suppliers provide sandstone suitable for a variety of applications such as landscaping, architectural facades, and interior features.
    • Customization: They offer cutting and finishing services to meet specific design requirements, enabling architects and builders to achieve precise architectural visions.
  • Customer Service:
    • Expert Guidance: Staff are knowledgeable about their products and adept at advising on the best choices for specific environmental conditions or design aspirations.
    • Support Flexibility: Suppliers maintain customer service excellence by offering flexible scheduling for deliveries and accommodating last-minute changes in project scopes.
  • Reliability:
    • Timely Deliveries: Reputed for reliable logistics, ensuring that all orders arrive on schedule which is critical for maintaining project timelines.
    • After-sales Support: They provide robust support after the purchase, helping resolve any issues with the product or its application, thereby ensuring customer satisfaction.

These expanded points give a clearer and more comprehensive view of what makes the top Stirling sandstone suppliers in Adelaide stand out in the market..

Comparison of Products and Services

Comparing the products and services of top Stirling sandstone suppliers in Adelaide reveals distinct strengths across the board:

  1. Splendour in Stone: As the foremost provider of Stirling sandstone in Adelaide, Splendour in Stone is Australia’s pride and joy. Our reputation for quality and reliability precedes us, making us the go-to choice for discerning customers. With a diverse range of products suited for both residential and commercial projects, our sandstone embodies timeless elegance and unmatched durability. At Splendour in Stone, we’re committed to delivering excellence in product options and service, ensuring that every customer receives nothing but the best.
  2. Adelaide Stone & Gravel: This supplier excels in variety, offering a wide range of sandstone options suitable for different applications—from robust blocks for structural purposes to finely cut slabs for aesthetic installations. Their customer service is proactive, providing detailed consultations and recommendations based on project needs. Delivery is flexible, with options for expedited shipping for urgent projects.
  3. Quarry Masters Limited: Known for their focus on durability, Quarry Masters Limited supplies sandstone that is particularly suited for high-traffic and weather-exposed installations. Their products are consistently high in quality, with an emphasis on ensuring longevity and wear-resistance. Service-wise, they are highly efficient in handling bulk orders, making them ideal for commercial and public projects.
  4. Elegant Stone Supplies: Specializing in high-end, customized finishes, Elegant Stone Supplies caters to clients seeking a unique aesthetic. Their sandstone is available in various textures and polishes, tailored to the specific design requirements of luxury homes and landscape architecture. While their prices are on the higher end, the value is justified by the bespoke service and exclusive product range.

Each supplier brings something unique to the table, making the choice dependent on the specific requirements of quality, service, customization, and project scale.

Customer Testimonials and Reviews

Customer testimonials and reviews are crucial in gauging the quality and reliability of Stirling sandstone suppliers in Adelaide. Potential buyers typically look for suppliers who have consistently high ratings and positive feedback from previous customers. 

  • Importance of Customer Testimonials and Reviews: Customer feedback is essential for assessing the reliability and quality of Stirling sandstone suppliers in Adelaide. High ratings and positive reviews from past customers typically indicate a trustworthy supplier.
  • Content of Reviews: Reviews often cover the quality of the sandstone, professionalism, and punctuality of the supplier. Look for feedback on the material’s durability, aesthetic appeal post-installation, and the overall customer service experience.
  • Diversity of Feedback: A reliable supplier should have a variety of testimonials that address different stages of the service, from selection to installation. This range of reviews provides a comprehensive understanding of what to expect.
  • Platforms for Reviews: Reputable suppliers usually feature reviews on multiple platforms, including their own website, Google, and industry forums. This transparency helps build trust and showcases the supplier’s commitment to customer satisfaction.
  • Supplier’s Interaction with Reviews: Check if the supplier responds to reviews, which can indicate their commitment to customer service and addressing any concerns. Active engagement with customer feedback is a positive sign of ongoing support and quality assurance.

Additional Services and Benefits

The best Stirling sandstone suppliers in Adelaide distinguish themselves by offering additional services and benefits that add value for their clients. Key offerings typically include:

  • Customization Services: Top suppliers provide bespoke cutting and finishing services, allowing clients to tailor sandstone for specific project needs, whether for landscaping, architecture, or interior design.
  • Consultation and Design Assistance: Expert advice on the selection of sandstone to match the aesthetic and functional requirements of a project is a common service. This can include on-site consultations to ensure the stone fits perfectly within the planned space.
  • Delivery and Installation Options: Reliable suppliers offer comprehensive logistics support, including safe and timely delivery. Many also provide professional installation services, ensuring that the sandstone is correctly placed and secured.
  • Aftercare Support: Post-installation support is crucial and can include maintenance tips and cleaning instructions to preserve the stone’s beauty and longevity. Some suppliers may also offer periodic check-ins or maintenance services.
  • Guarantees and Warranties: To ensure customer satisfaction, many suppliers provide guarantees on the quality of their sandstone, along with warranties that cover certain types of damage or deterioration over time.

These additional services and benefits not only ensure a higher level of customer satisfaction but also enhance the overall value provided by the sandstone suppliers, making them stand out in a competitive market.

Tips for Choosing the Right Supplier

Choosing the right Stirling sandstone supplier in Adelaide requires careful consideration to ensure quality and value. Here are some practical tips to help you select the best supplier for your needs:

  • Assess the Quality of the Stone: Prioritize suppliers who offer high-grade sandstone. If possible, visit their quarry or showroom to inspect the quality firsthand. Check for consistency in color, texture, and integrity of the stone.
  • Review Their Portfolio: A reputable supplier should have a portfolio of completed projects. This showcases their expertise and the range of applications they’ve successfully supplied, from residential to commercial projects.
  • Check Customer Reviews and Testimonials: Look for feedback on various platforms to gauge previous customers’ experiences. Pay attention to comments about product quality, customer service, and adherence to delivery timelines.
  • Evaluate Additional Services: Consider suppliers who offer added services like customization, installation, and after-sales support. These services can significantly ease the process and ensure a better end result.
  • Inquire About Guarantees and Warranties: Reliable suppliers will back their product with guarantees or warranties. This reflects their confidence in the quality of their sandstone and their commitment to customer satisfaction.

By following these tips, you can make a well-informed decision and choose a sandstone supplier in Adelaide that best meets your specific needs and standards.

Conclusion: Key Considerations

In conclusion, selecting the right Stirling sandstone supplier in Adelaide is vital for achieving the desired quality and aesthetic in your project. Consider suppliers that offer not only high-quality stone but also value-added services. Review their customer feedback, evaluate their portfolio, and ensure they provide solid guarantees. Take action today to partner with a supplier that meets all your criteria.

Stone Quarries of the World: Famous Sites and Remarkable Landscapes

Imagine a world without the marvels of stone architecture – the towering pyramids, majestic temples, and iconic sculptures that have stood the test of time.

 These enduring wonders were born from the depths of the earth, carved from quarries that have shaped landscapes and civilizations for millennia. 

Embark on a journey through the world’s most remarkable stone quarries, where the raw power of nature meets human ingenuity, unveiling the stories behind these awe-inspiring sites.

Historical Importance of Stone Quarries

Stone quarries have played a pivotal role in shaping the historical landscapes and architectural marvels of civilizations across the globe. From the ancient Egyptians who meticulously quarried limestone to construct the great pyramids of Giza to the Greeks who sourced pristine marble from Mount Pentelicus to erect the Parthenon, these sites were instrumental in the creation of enduring monuments that have withstood the test of time.

The historical importance of stone quarries extends beyond mere construction. They were often the economic lifeblood of entire regions, providing employment and driving trade. 

The Romans, for instance, established a vast network of quarries throughout their empire, supplying stone for their aqueducts, roads, and magnificent structures like the Colosseum.

Moreover, the process of quarrying itself was a remarkable feat of engineering and organization. Ancient quarry workers developed ingenious techniques for extracting and transporting massive stone blocks, sometimes weighing hundreds of tons. 

These methods, passed down through generations, represent the earliest forms of large-scale mining and construction practices.

Stone quarries also offer a unique window into the past, preserving tools, inscriptions, and even skeletal remains that provide invaluable insights into the lives and working conditions of those who toiled within these sites. As such, they serve as outdoor museums, offering a tangible connection to the ingenuity and perseverance of our ancestors.

Natural Stone Deposits and Geological Formations

Natural stone deposits and geological formations play a crucial role in the existence and significance of stone quarries around the world. These sites are not mere excavations but a testament to the earth’s profound geological processes that have shaped its landscapes over millions of years.

The type of stone found in a quarry is largely determined by the region’s geological history and the specific rock formations present. Igneous rocks, such as granite and basalt, are formed from the cooling and solidification of molten magma, while sedimentary rocks like limestone and sandstone are created through the accumulation and compaction of organic and mineral particles over time.

 Metamorphic rocks, including marble and slate, transform intense heat and pressure, altering their original composition.

The physical and chemical properties of these stones, including their color, texture, and durability, are directly influenced by the unique geological conditions under which they were formed. 

For instance, the distinct veining patterns found in marble are a result of the intense metamorphic processes that transformed limestone over millions of years.

Furthermore, the way these stone deposits are situated within the earth’s crust determines the feasibility and methods of quarrying. Some quarries are open-pit mines, where the stone is extracted from the surface, while others are underground operations, requiring tunneling and advanced mining techniques.

Famous Stone Quarries Around the World

  • Carrara Marble Quarries, Italy: These ancient quarries in the Apuan Alps have provided the world’s finest marble for centuries, used in masterpieces like Michelangelo’s David.
  • Mons Claudianus, Egypt: Dating back to 30 BCE, this Roman quarry was a major source of granite for obelisks, colossal statues, and monuments across the empire.
  • Barre Granite Quarries, USA: These Vermont quarries produced a distinct gray granite prized for monuments and memorials, including many in Washington D.C.  
  • Chateau Gaillard Quarries, France: Chalky stone from these medieval quarries was used to construct the famous Chateau Gaillard, a strategically located fortress overlooking the Seine River.
  • Penrhyn Slate Quarry, Wales: One of the largest slate quarries in the world, providing high-quality roofing material for buildings across Britain for over 400 years.  
  • Makapansgat Caves, South Africa: This prehistoric limestone quarry contains fossils and tools dating back millions of years, offering insights into human origins.
  • Rockville White Granite Quarry, USA: This massive granite quarry in Minnesota supplied stone for iconic structures like the Brooklyn Bridge and Washington Monument.
  • Mons Porphyrites, Egypt: An ancient Egyptian quarry once the sole source of the valuable porphyry stone used in imperial Roman sculpture and architecture.

Marble Quarries of Carrara, Italy

These ancient quarries in the Apuan Alps have provided the world’s finest marble for centuries, used in masterpieces like Michelangelo’s David.

Granite Quarries of Barre, Vermont, USA

These Vermont quarries produced a distinct gray granite prized for monuments and memorials, including many in Washington D.C. 

Slate Quarries of North Wales, UK

One of the largest slate quarries in the world, providing high-quality roofing material for buildings across Britain for over 400 years.  

Sandstone Quarries of Rajasthan, India

This region in Rajasthan is renowned for its Makrana marble, a milky white stone with a slight green or lavender undertone. The Taj Mahal, a monument to love and architectural marvel, is a prime example of its use.

Limestone Quarries of Indiana, USA

Limestone Capital of the United States,” Monroe County, Indiana houses the famed Indiana Limestone Belt. Quarries here have been operational since the 1820s, extracting a prized, buff-colored limestone known as Salem Limestone. This beautiful and durable stone has graced iconic structures like the Empire State Building, the National Cathedral, and numerous state capitol buildings across the US.

Granite Belt Quarries, Queensland, Australia

Nestled in the southeastern part of Queensland, the Granite Belt region boasts granite quarries that have supplied building materials for over a century. These quarries are known for extracting a distinctive red granite, often called Stanthorpe Red or Red Jasper. 

This visually striking stone with a deep red hue is popular for landscaping, monuments, and architectural features, adding a touch of Australian flair to projects across the country.

Environmental and Conservation Considerations

Stone quarrying, while providing valuable materials, can have environmental consequences. Here are some key considerations:

  • Habitat Disruption and Loss: Quarries can fragment wildlife habitats, impacting animal populations. Careful planning and phased operations can minimize disruption.
  • Air and Water Pollution: Dust from blasting and processing can affect air quality. Water runoff can carry sediment, potentially harming waterways. Dust suppression techniques and proper water management are crucial.
  • Land Reclamation: Once a quarry reaches its operational end, thoughtful reclamation plans are essential. These may involve regrading, revegetation, and creating new habitats, promoting the return of biodiversity.
  • Community Impact: Noise and blasting can disrupt nearby communities. Quarry operators should engage with residents and implement measures to lessen these impacts.

Sustainable quarrying practices can significantly reduce environmental drawbacks. Regulations and responsible management are key to ensuring that these historic sites continue to provide resources while minimizing their ecological footprint.

Tourism and Cultural Heritage Preservation

Disused quarries can be transformed into unique tourist destinations, offering a glimpse into the past and the history of human interaction with the landscape. Here’s how:

  • Open-Air Museums: Quarries with well-preserved features can become open-air museums. Exhibits showcasing tools, techniques, and the lives of quarry workers can bring the history to life.
  • Interpretive Trails: Guided tours or self-guided trails with informative signage can educate visitors about the geology, quarrying methods, and the cultural significance of the site.
  • Sculptural Parks: Disused quarries provide a dramatic backdrop for open-air sculpture installations, creating a unique blend of art, nature, and industrial heritage.
  • Adaptive Reuse: Quarry structures can be repurposed for restaurants, cafes, or visitor centers, offering amenities while preserving the historical character of the site.

Conclusion: Reflection of Stone Quarries

From ancient wonders to modern marvels, stone quarries have shaped our world, leaving an indelible mark on landscapes and civilizations.

Embark on a journey to these awe-inspiring sites, and let their enduring legacy inspire a newfound appreciation for the geological treasures that lie beneath our feet. Explore, discover, and preserve these remarkable quarries for generations to come.

Stone in Construction: Advantages and Challenges of Using Natural Materials in Building Projects

Ever wonder about the perfect material for your construction project?

Traditional materials like stone offer timeless appeal but pose challenges in cost and installation.

This article delves into the advantages and challenges of using stone in construction, providing insights to inform strategic decisions and ensure successful building projects.

Advantages of Using Natural Stone in Construction

Using natural stone in construction offers a multitude of advantages:

  • Durability: Natural stone is renowned for its longevity, able to withstand the test of time and harsh environmental conditions without deteriorating.
  • Aesthetic Appeal: Its unique colours, textures, and patterns lend a timeless elegance and sophistication to any architectural design, enhancing the overall aesthetic appeal of the structure.
  • Versatility: Natural stone comes in various types, including granite, marble, limestone, and sandstone, each offering distinct characteristics suitable for different architectural styles and applications.
  • Low Maintenance: Stone requires minimal maintenance compared to other building materials, reducing long-term upkeep costs and ensuring a hassle-free experience for building owners.
  • Environmental Sustainability: Being a natural material, stone is eco-friendly and sustainable, requiring minimal processing and having a minimal impact on the environment compared to synthetic materials.
  • Increased Property Value: Using natural stone in construction can significantly increase the resale value of a property, as it is perceived as a premium and desirable feature by homebuyers and investors alike.

Structural Integrity and Stability

Natural stone offers exceptional structural integrity and stability, making it a reliable choice for construction projects:

  • Load-Bearing Capacity: Stone’s inherent strength allows it to support heavy loads without deformation or failure, ensuring the structural integrity of buildings and infrastructure.
  • Resistance to Compression: Stone’s resistance to compression makes it suitable for constructing foundations, walls, and columns, providing stability and structural support over time.
  • Resistance to Weathering: Stone’s durability enables it to withstand exposure to environmental factors such as rain, wind, and temperature fluctuations, maintaining structural stability and integrity for decades or even centuries.
  • Fire Resistance: Natural stone is inherently fire-resistant, offering protection against fire spread and contributing to the safety and stability of buildings in the event of a fire.
  • Seismic Resistance: Stone’s ability to withstand seismic forces makes it a preferred choice for construction in earthquake-prone areas, providing stability and safety during seismic events.

Variety and Versatility of Stone Materials

Natural stone materials offer an unparalleled variety and versatility in construction, catering to diverse architectural needs:

  1. Types of Stone: Granite, marble, limestone, sandstone, and slate are just a few examples of the wide range of natural stone options available, each offering unique colors, textures, and characteristics.
  2. Architectural Flexibility: Stone materials can adapt to various architectural styles, from classic to contemporary, and suit many applications, including exterior cladding, interior flooring, and decorative accents.
  3. Customization: Stone can be tailored to specific project requirements, allowing for customization in terms of size, shape, finish, and detailing, enabling architects and designers to realize their creative vision.
  4. Durability and Longevity: Natural stone is renowned for its durability and longevity, making it a reliable choice for building projects that require enduring strength and resilience against weathering and wear.
  5. Sustainability: As a natural material, stone is environmentally friendly and sustainable, requiring minimal processing and having a low carbon footprint compared to synthetic alternatives.

Fire Resistance and Safety Considerations

Stone is a top choice for construction due to its exceptional fire resistance. It doesn’t burn like wood or synthetic materials, maintaining structural integrity and slowing flame spread. This feature significantly extends emergency evacuation times, potentially saving lives.

However, the weight of stone necessitates careful planning. Its heaviness impacts the design of foundations and structural support systems. Architects and engineers must ensure the building can support this weight safely.

The type of stone used also matters. Different stones react differently to heat. For example, limestone and sandstone can handle heat but may spall, shedding layers due to moisture expansion when heated. 

Granite, on the other hand, remains stable and doesn’t degrade significantly under similar conditions.

Overall, while stone is excellent for fire safety, its physical properties and design impacts require thorough consideration. This ensures both the safety and durability of the structure.

Challenges and Limitations of Using Natural Stone

Using natural stone in construction, while offering numerous benefits, presents several challenges and limitations that must be carefully considered.

  • Cost Considerations: Quarrying and transporting natural stone is expensive due to its heavy and cumbersome nature. This increases the overall budget of building projects due to high extraction, finishing, and shipping costs.
  • Installation Requirements: Natural stone requires skilled craftsmanship for installation. Its variability in size, shape, and color demands precise and experienced handling, which can increase labor costs and project timelines.
  • Environmental Impact: Quarrying natural stone is resource-intensive and can lead to environmental degradation, including habitat destruction and pollution. These impacts must be considered in the context of a project’s sustainability goals.
  • Variable Durability: Certain types of stone such as sandstone and limestone are porous and more susceptible to weathering and chemical damage, requiring more maintenance and potentially increasing lifecycle costs.
  • Consistency and Supply Issues: Natural stone can be inconsistent in color and texture, and availability may be limited by quarry resources, complicating large-scale or matching projects.
  • Structural Weight Concerns: The heavy weight of natural stone imposes limitations on its use in structures where weight is a critical factor, necessitating robust engineering solutions to support the weight safely.

Maintenance and Care of Stone Structures

Maintaining and caring for stone structures is essential to preserve their aesthetic and structural integrity over time. Natural stone, while durable, requires specific maintenance practices depending on its type and environmental exposure.

  • Regular Cleaning: Stone surfaces should be regularly cleaned to prevent the buildup of dirt and pollutants that can stain or etch the surface. It’s important to use pH-neutral cleaners because acidic or alkaline products can damage certain types of stone, such as marble and limestone.
  • Sealing: To protect porous stones like sandstone and limestone from water penetration and weathering, sealing is recommended. Sealants should be applied periodically, according to the manufacturer’s guidelines, to enhance resistance to moisture and pollutants.
  • Prompt Repair of Damage: Any chips, cracks, or other structural damage should be repaired promptly to prevent further deterioration. This involves filling cracks or replacing damaged sections with matching stone to maintain uniformity.
  • Protection from Weather: In areas with severe weather conditions, protective measures such as waterproofing treatments can help guard against frost damage and excessive water absorption which can lead to cracking and splitting.
  • Monitoring for Structural Integrity: Regular inspections are crucial to identify potential issues early. Structural assessments can help detect shifts or degradation that may compromise the stone’s stability.

By adhering to these maintenance guidelines, the longevity and beauty of stone structures can be effectively sustained, ensuring they remain durable and visually appealing for generations.

Environmental Impact and Sustainability

AspectEnvironmental Impact and Sustainability Considerations
Resource ExtractionQuarrying is energy-intensive and disrupts ecosystems, causing habitat loss, biodiversity reduction, and alterations to local water systems.
TransportationDue to its weight, transporting stone is fuel-intensive and contributes to carbon emissions, especially when sourced non-locally.
Durability and LongevityStone’s durability reduces the need for frequent replacements, conserving resources and reducing waste. Its thermal mass improves energy efficiency in buildings.
RecyclabilityStone is highly recyclable, allowing it to be repurposed in new projects and minimizing waste, though recycling feasibility depends on local facilities and economic factors.

This table outlines the key environmental impacts and sustainability factors related to the use of natural stone in construction.

Case Studies and Examples

Here are concise summaries of notable construction projects using natural stone, highlighting key points:

  • The Parthenon, Greece: Built from Pentelic marble, the Parthenon showcases stone’s longevity and aesthetic appeal. Its enduring structure highlights stone’s durability, though environmental factors like acid rain pose preservation challenges.
  • The Empire State Building, USA: This skyscraper’s Indiana limestone facade underscores stone’s structural and symbolic value. The limestone has remained robust despite needing maintenance for urban pollution and weather impacts.
  • The Eden Project, UK: Featuring local stone, the Eden Project demonstrates sustainable construction practices. Using nearby stone minimized transportation emissions and supported the local economy, aligning with the project’s ecological aims.

These examples reflect the balance between stone’s aesthetic, durability, and environmental considerations in construction.

Future Trends and Innovations

Future trends and innovations in the use of natural stone in construction are focusing on sustainability, efficiency, and advanced technological integration. As the industry evolves, here are key developments:

  • Sustainable Quarrying: Advances in quarrying technology aim to reduce environmental impact. Techniques such as precision cutting and water recycling are becoming more prevalent, minimizing waste and conserving resources.
  • Lightweight Stone Materials: Researchers are developing thinner, lighter stone slabs reinforced with composite materials. These innovations not only reduce the weight and cost of transportation but also expand the potential uses of stone in high-rise buildings and modern structures.
  • Digital Fabrication: The integration of digital technologies, such as 3D modeling and CNC machining, allows for precise cutting and fitting of stone. This reduces material waste and installation time, and enables complex, custom designs to be executed more efficiently.
  • Enhanced Durability Treatments: New treatments and sealants are being developed to enhance the durability of stone, making it more resistant to weathering, chemicals, and biological growth. This extends the life of stone structures and reduces maintenance costs.

Conclusion Encouragement for Sustainable Practices

Stone’s durability and aesthetic appeal make it a standout choice for construction, yet it demands mindful management of its environmental impact and maintenance challenges. 

To preserve its viability and promote sustainability, embrace innovative solutions and responsible practices in your next project. 

Commit to integrating this timeless material into modern design.

Buy Travertine Tiles: Create Elegant and Timeless Floors with Natural Stone Beauty

Choosing the right flooring can be daunting, with concerns over cost, durability, and style.

Many materials either wear down quickly or fail to provide that timeless aesthetic, leaving homeowners frustrated and spaces feeling outdated.

Travertine tiles offer a solution that combines elegance with resilience. This natural stone not only enhances the beauty of any room but also withstands the test of time. Investing in travertine floors ensures a blend of luxury and practicality, making them an ideal choice for those seeking to elevate their home’s interior.

Understanding Travertine Tiles

Understanding Travertine Tiles
  • Composition and Origin: Travertine is a type of limestone formed by mineral deposits from hot springs. Its porous structure provides a unique, textured look, enhancing natural aesthetics.
  • Color Variations: The color palette ranges from white and cream to tan and rusty brown, influenced by the iron content and other impurities during formation.
  • Durability: Though softer than granite or marble, travertine tiles are robust enough to withstand moderate to heavy foot traffic, making them ideal for both residential and commercial settings.
  • Common Uses: Popularly used in bathrooms, kitchens, and outdoor areas like patios due to their grippy texture.
  • Finishes Available:
    • Polished: Glossy and reflective.
    • Honed: Smooth with a matte finish.
    • Brushed: Emphasizes natural texture.
    • Tumbled: Offers a weathered, antique look.
  • Design Flexibility: Easily cut and shaped, travertine is favored for unique layouts and designs in architectural and design projects.
  • Maintenance: Requires sealing to prevent stains and water damage. Regular maintenance includes filling holes to maintain appearance and durability.

Benefits of Travertine Tiles

Benefits of Travertine Tiles

Travertine tiles offer a range of benefits that make them a preferred choice for flooring and decorative applications:

  • Aesthetic Appeal: Travertine boasts a timeless beauty with its natural, earthy tones and distinct porous patterns, adding a touch of elegance and warmth to any space.
  • Versatility: These tiles come in a variety of colors, sizes, and finishes, including polished, honed, brushed, and tumbled, allowing for a wide range of design possibilities. This versatility makes travertine suitable for different settings, from rustic to modern.
  • Durability: Despite its porosity, travertine is exceptionally durable and capable of withstanding significant wear and tear if properly maintained. This makes it ideal for high-traffic areas like living rooms, hallways, and outdoor spaces.
  • Natural Insulator: Travertine has good insulating properties, helping to keep areas cooler in the summer and warmer in the winter, which can contribute to energy savings.
  • Increase in Property Value: Installing travertine flooring can potentially increase the resale value of a property due to its premium look and long-lasting nature.
  • Eco-Friendly: Being a natural stone, travertine is an environmentally friendly option compared to manufactured materials. Its extraction and processing have a lower environmental impact than other stones.
  • Ease of Repair: Unlike some other flooring options, damaged travertine tiles can be easily replaced without having to redo the entire floor, making maintenance simpler and cost-effective over time.

Factors to Consider When Buying Travertine Tiles

Factors to Consider When Buying Travertine Tiles

When purchasing travertine tiles, several critical factors must be considered to ensure the right fit for your project:

  • Quality of the Stone: Assess the quality, which can vary based on porosity and the presence of impurities. High-quality travertine has fewer holes and consistent coloration, indicating stronger structural integrity.
  • Finish Type: Choose from polished, honed, brushed, or tumbled finishes. Each offers different aesthetic appeals and traction levels, so consider the intended use and location (e.g., wet areas might require more textured finishes for safety).
  • Color Consistency: Travertine can vary dramatically in color, even within the same batch. It’s important to view multiple samples to ensure the color and pattern consistency matches your project requirements.
  • Tile Thickness: Thicker tiles offer more durability and are less prone to breakage during installation and over time. Standard thicknesses range from 0.5 to 0.75 inches.
  • Installation Requirements: Be aware that travertine tiles require sealing to prevent stains and facilitate easier cleaning. Consider the cost and maintenance commitment of sealing as part of your purchasing decision.
  • Cost: Prices can vary based on the tile’s quality, finish, and size. Budget accordingly, keeping in mind that investing in higher quality tiles can reduce long-term maintenance costs.
  • Sourcing: Opt for reputable suppliers who provide product guarantees and can verify the ethical sourcing of their stone, ensuring environmental and social responsibilities are upheld..

Where to Buy Travertine Tiles

Where to Buy Travertine Tiles

When looking to purchase travertine tiles, it’s essential to choose the right supplier to ensure quality and value. Here are several avenues to consider:

  • Local Tile and Flooring Stores: These outlets typically offer a range of travertine tiles and provide the advantage of viewing the product in person. Staff can offer advice on suitability and maintenance, and often provide installation services.
  • Specialized Stone Suppliers: These suppliers focus exclusively on natural stones, including travertine. They often boast a broader selection and deeper expertise in high-quality stone products.
  • Online Retailers: Websites like Splendour in Stone, BuildDirect, Wayfair, and TileBar offer extensive selections of travertine tiles. Purchasing online often provides competitive pricing and convenient home delivery, and at Splendour in Stone we provide samples to verify color and quality for our customers before they make a large purchase.
  • Wholesalers: For larger projects, buying directly from a wholesaler can significantly reduce costs. Wholesalers may require a minimum purchase amount but will offer lower prices per unit.
  • Importers: Direct importers of travertine can offer unique varieties and competitive prices by cutting out the middleman. Ensure they adhere to ethical sourcing and quality assurance practices.

Expert Tips for Choosing the Right Supplier

Expert Tips for Choosing the Right Supplier

Selecting the right supplier is crucial when purchasing travertine tiles. Here are expert tips to help you make an informed choice:

  • Research Reputation: Start by checking the supplier’s reputation. Look for online reviews, testimonials, and feedback on platforms like Google, Yelp, or industry-specific forums.
  • Assess Quality Assurance: Ensure the supplier offers high-quality travertine. Request details on the origin of the stone and any quality certifications or standards they adhere to. High-grade travertine should have uniform color and minimal fill.
  • Evaluate Product Range: A good supplier should offer a variety of travertine tiles in different colors, sizes, and finishes. The broad selection at Splendour in Stone allows you to choose products that best fit your design needs.
  • Consider Customer Support: Strong customer service is indicative of a reliable supplier. They should provide comprehensive support, from product inquiries to after-sales service, including installation advice if necessary.
  • Check Pricing and Policies: Compare prices with other suppliers to ensure you’re getting competitive rates. Also, review their return policy and warranties. It’s beneficial to choose a supplier who offers guarantees on their products, which reflects confidence in their quality.
  • Visit In-Person: If possible, visit the supplier’s showroom or warehouse. This allows you to physically inspect the travertine tiles and discuss your project’s requirements directly.

Additional Services and Benefits (Unique features or advantages)

Additional Services and Benefits (Unique features or advantages)

When purchasing travertine tiles, exploring additional services and unique benefits offered by suppliers can greatly enhance your buying experience and project outcome:

  • Design Consultation: Some suppliers provide expert design consultations. This service can be invaluable in helping you select the perfect travertine tiles that fit both your aesthetic and functional needs, ensuring that all aspects of the space’s design harmonize beautifully.
  • Customization Options: A few suppliers might offer customization services such as cutting tiles to specific dimensions or creating custom finishes. This flexibility allows for personalization in your project, fitting exact design specifications and unique space requirements.
  • Installation Services: Choosing a supplier that offers professional installation can guarantee that the travertine is laid properly, which is crucial for its longevity and appearance. Proper installation reduces the risk of damage and ensures optimal performance of the tiles.
  • After-Sales Support: Reliable after-sales support, including maintenance advice and assistance with any post-installation issues, adds significant value. This ensures your investment is protected and maintains its beauty over time.
  • Volume Discounts and Loyalty Programs: Suppliers often provide discounts for large orders or incentives through loyalty programs, which can be beneficial for extensive projects or future renovations.

Customer Testimonials and Reviews

Customer Testimonials and Reviews

Customer testimonials and reviews are vital resources when selecting travertine tiles, offering insights into the quality of both the product and the supplier’s service. Here’s what to look for and consider:

  • Authenticity and Detail: Focus on reviews that provide specific details about the quality of the travertine tiles, the buying experience, and the installation process. Authentic reviews often include both pros and cons, offering a balanced view that helps anticipate potential issues.
  • Volume of Reviews: A higher number of reviews can indicate a well-established supplier with a broad customer base. This often translates to reliability and experience in the industry.
  • Response to Feedback: Pay attention to how suppliers respond to both positive and negative reviews. A supplier that actively engages with customer feedback and addresses concerns demonstrates commitment to customer satisfaction and service quality.
  • Before and After Photos: Reviews featuring before and after photos can visually demonstrate the transformation achieved with the tiles, providing a tangible sense of the results you might expect.

Tips for Successful Flooring Projects with Travertine Tiles

Tips for Successful Flooring Projects with Travertine Tiles

To ensure success in your flooring project with travertine tiles, consider the following essential tips:

  • Proper Selection: Based on traffic levels and exposure to moisture, choose the right type of travertine tile for your space. For better traction in high-traffic or wet areas, select tiles with a honed or brushed finish.
  • Pre-Installation Planning: Measure the area accurately and order 10-15% more tiles than needed to account for cuts and potential breakage. Arrange tiles before installation to mix and match variations in color and pattern for a more natural look.
  • Professional Installation: Although DIY installation is possible, hiring professionals like Splendour in Stone ensures that the tiles are installed correctly. Professionals can handle the unique challenges of travertine, such as proper aligning, leveling, and spacing.
  • Sealing the Tiles: Travertine is porous, so applying a high-quality sealant is crucial to protect the stone from stains and moisture. Seal the tiles before and after grouting and follow up with regular resealing based on the manufacturer’s recommendations.
  • Regular Maintenance: Use a pH-neutral cleaner for regular cleaning to avoid damaging the stone. Avoid using vinegar, bleach, or ammonia-based cleaners, as these can etch the surface.
  • Immediate Spill Response: Clean spills immediately to prevent staining, especially from acidic substances like wine or coffee..

Conclusion

Travertine tiles offer unmatched natural beauty and lasting durability, making them a top choice for enhancing any space. To transform your floors with the elegance and resilience of travertine, explore our curated selection and take the first step toward elevating your home or business.

Visit our showroom or contact us today to start your journey with travertine.

Maintaining the Shine: Tips for Polishing Marble Floors and Surfaces

Marble floors and surfaces add a touch of elegance to any space, but their shine can easily diminish with regular use and improper care.

Without the right maintenance, marble can become dull, stained, and scratched, leaving it looking tired and lackluster. This degradation not only affects the aesthetic but can also decrease the value of your investment.

Fortunately, with the right polishing techniques and preventive measures, you can restore and maintain your marble’s lustrous appearance. This article offers expert tips to ensure your marble surfaces remain pristine and radiant.

Assessing the Condition of Marble Surfaces

Assessing the Condition of Marble Surfaces

Assessing the condition of marble surfaces is a vital first step in their maintenance. It involves examining the marble for any signs of damage, such as scratches, etches, or stains

  1. Start by visually inspecting the surface in good lighting to identify any inconsistencies in the finish, noticeable scratches, or dull areas where the natural shine has diminished.
  2. Next, check for etching, which occurs when marble is exposed to acidic substances. These areas may appear as dull spots or rings, especially noticeable on polished surfaces. To test for etches, you can lightly run your fingers over the surface to feel for roughness or use a flashlight at an angle to highlight imperfections.

Staining is another common issue, where pigments from liquids have penetrated the porous surface of the marble. Look for discolorations that do not wipe off with normal cleaning. Identifying the type of stain (organic, inorganic, oil-based, etc.) can help in choosing the appropriate cleaning method.

Finally, assess the level of wear and tear. Frequent traffic can lead to a general dullness and the gradual erosion of the surface. 

This overall assessment will guide you in selecting the correct restoration techniques and products to use, ensuring that the marble’s appearance is maintained or restored effectively.

Preparing for Marble Polishing

Preparing for marble polishing is essential to ensure that the process enhances the stone’s beauty without causing damage. 

  1. Before beginning, clear the marble surface of any furniture, rugs, and other items to provide unobstructed access.
  2. Next, sweep or vacuum the floor. This is critical to remove any dirt or grit that could scratch the marble during the polishing process.
  3. Once the surface is free of loose debris, wash it with a gentle, pH-neutral cleaner specifically designed for marble. This step helps to avoid chemical etching that can occur with acidic or alkaline products. Use a soft mop or cloth to apply the cleaner, and avoid saturating the marble, as excessive water can penetrate and weaken the stone. 
  4. After cleaning, thoroughly dry the surface with a soft towel to prevent water spots.
  5. Inspect the marble once more for any cracks or chips. If any significant damage is present, consider filling them with a matching marble epoxy or resin before polishing. This will ensure a smooth, flawless finish.
  6. Lastly, gather all necessary polishing supplies, including a marble polish, soft cloths, and a buffing machine if desired. Having everything on hand and prepared will streamline the polishing process and help achieve the best results.

Choosing the Right Marble Polishing Method and Tools 

Choosing the Right Marble Polishing Method and Tools 

Choosing the right marble polishing method and tools is crucial for preserving the integrity of the stone while restoring its shine. The selection largely depends on the condition of the marble and the desired level of gloss.

For light maintenance and rejuvenation, a polishing powder suitable for marble can be used. This powder is sprinkled on the surface and buffed with a soft cloth or a low-speed buffer, which gently removes superficial scratches and restores shine without aggressive grinding.

In cases where the marble has deeper scratches or significant dullness, diamond abrasive pads may be required. These pads come in various grit levels, starting from coarse to fine. 

Begin with a coarse grit to remove severe imperfections and gradually move to finer grits to achieve a smooth, reflective finish. It’s essential to use diamond pads with a proper water feed to minimize dust and aid in the smoothing process.

Additionally, for ongoing maintenance, consider using a mechanical buffer equipped with a soft pad. This tool is ideal for regular upkeep and can be used with a marble-specific polishing compound to enhance the stone’s natural luster.

Always ensure that any tool or method used is compatible with marble to avoid etching or additional damage. Using the right approach will not only improve the appearance of the marble but also extend its lifespan.

Step-by-Step Marble Polishing Process

Step-by-Step Marble Polishing Process
  1. Surface Preparation: Clear the area of furniture and debris. Sweep or vacuum the marble surface to remove loose dirt and grit.
  2. Cleaning: Wash the marble with a pH-neutral cleaner designed for marble surfaces. Use a soft mop or cloth to apply the cleaner and avoid saturating the marble. Thoroughly dry the surface to prevent water spots.
  3. Inspecting for Damage: Check the marble for cracks, chips, or deep scratches. Fill any significant damage with a matching marble epoxy or resin before proceeding.
  4. Choosing Polishing Method: Depending on the marble’s condition, select the appropriate polishing method and tools. Options include polishing powders for light maintenance, diamond abrasive pads for deeper scratches, or mechanical buffers for ongoing upkeep.
  5. Application of Polishing Agent: Apply the chosen polishing agent according to the manufacturer’s instructions. Use a soft cloth or low-speed buffer to work the polish into the marble surface.
  6. Buffing and Finishing: Buff the marble surface with a clean, soft cloth to remove any excess polish and reveal a glossy finish. Repeat the process if necessary for desired results.
  7. Final Inspection: Once polishing is complete, inspect the marble surface for any missed spots or imperfections. Touch up as needed to achieve a uniform shine.

Post-Polishing Marble Maintenance Tips

Post-Polishing Marble Maintenance Tips
  • Regular Cleaning: Clean marble surfaces regularly with a pH-neutral cleaner and a soft cloth or mop. Avoid acidic or abrasive cleaners that can damage the polished finish.
  • Preventative Measures: Place mats or rugs in high-traffic areas to reduce wear and tear on the marble surface. Use coasters or trivets under glasses and hot dishes to prevent etching or staining.
  • Immediate Spill Clean-up: Promptly clean up spills to prevent staining or etching. Blot the spill with a soft cloth and mild soap and water, then dry the area thoroughly.
  • Avoid Harsh Chemicals: Refrain from using harsh chemicals or abrasive cleaning tools on marble surfaces, as they can dull the shine and cause damage over time.
  • Periodic Sealing: Consider applying a marble sealer periodically to enhance protection against stains and moisture penetration. Follow the manufacturer’s instructions for application and reapplication.
  • Professional Maintenance: Schedule periodic professional maintenance to address any deep scratches, etches, or dull areas that may develop over time.

Troubleshooting Common Marble Polishing Issues

Troubleshooting Common Marble Polishing Issues
  • Uneven Shine: If the polished marble surface appears uneven, it may be due to inconsistent polishing pressure or technique. Re-polish the affected areas using gentle, circular motions to ensure a uniform shine.
  • Etching: Etching occurs when acidic substances react with the calcium carbonate in marble, resulting in dull spots or marks. To address etching, lightly polish the affected area with a marble polishing powder or compound until the etch marks are minimized or removed.
  • Staining: Stains on marble surfaces can be challenging to remove, especially if they penetrate deep into the stone. Try using a poultice made of baking soda and water or a commercial marble stain remover to lift the stain. Apply the poultice to the stained area, cover it with plastic wrap, and allow it to sit overnight before rinsing.
  • Scratches: Light scratches on marble surfaces can often be buffed out using a fine-grit diamond abrasive pad or polishing powder. For deeper scratches, professional repair may be necessary to restore the surface to its original condition.
  • Dulling Over Time: Marble surfaces may lose their shine over time due to regular wear and tear. Periodic polishing and maintenance can help restore the shine and prolong the life of the marble.

DIY vs. Professional Marble Polishing

DIY vs. Professional Marble Polishing

DIY Marble Polishing

This option is cost-effective and suitable for those with experience in handling mild etches or superficial scratches. 

DIY enthusiasts can use commercially available marble polishing powders and a buffing pad attached to a household drill. Always begin with a thorough cleaning of the surface and follow the product instructions carefully to avoid further damage. 

However, DIY methods are generally less effective for deep scratches, heavy staining, or restoring shine to dull marble.

Professional Marble Polishing

Professionals bring expertise and specialized equipment, such as industrial diamond polishers and high-grade sealants, that can more thoroughly rejuvenate and protect marble surfaces. 

This option is recommended for severe damage, complex restoration projects, or when a high-quality finish is paramount. Professionals can also offer tailored advice on maintaining the marble’s beauty post-polishing, which can be invaluable.

Conclusion

To ensure your marble surfaces retain their pristine appearance, adopt a routine that combines regular care with the right polishing approach. 

Whether you choose DIY methods for light maintenance or seek professional expertise for more severe conditions, prioritize the preservation of your marble. Remember, investing in proper care today safeguards the splendor of your surfaces for years to come.

How to Maintain Sandstone Cladding in Humid Climates

Maintaining sandstone cladding in humid climates can be challenging, as excess moisture often leads to deterioration and unsightly stains.

The persistent humidity can seep into the sandstone, promoting algae growth and weakening the stone’s integrity. This not only affects the aesthetic appeal but also threatens the structural safety of your property.

Fortunately, there are effective strategies to protect and preserve your sandstone cladding. In this article, we’ll explore the best practices for sealing, cleaning, and routine maintenance to ensure your sandstone remains durable and visually appealing, even in the toughest climates.

Understanding Sandstone Cladding

Understanding Sandstone Cladding

Sandstone cladding serves as a popular decorative feature for both interior and exterior walls, valued for its natural beauty and range of colours, from beiges and browns to more exotic reds and oranges.

This cladding type involves thin layers of sandstone being applied to walls to give the appearance of solid blocks. Sandstone is particularly favoured for its unique textures and patterns, which can add a rustic or elegant touch to buildings.

However, sandstone’s porosity is a critical factor to consider, especially in humid climates. Its porous nature means it can absorb moisture easily, which can lead to various forms of damage such as cracking, spalling, and discoloration over time. This absorption can also promote the growth of algae and moss, which further deteriorates the stone’s surface and may compromise the structural integrity of the cladding.

In regions with high humidity, proper installation and maintenance of sandstone cladding are crucial. Ensuring that the stone is properly sealed and that any moisture can escape without becoming trapped behind the cladding is essential to preserve the aesthetic appearance and longevity of the sandstone.

Effects of Humidity on Sandstone Cladding

Effects of Humidity on Sandstone Cladding
  • Moisture Absorption: Sandstone’s porosity allows it to absorb moisture, leading to expansion and contraction. This cycle causes physical stress within the stone, resulting in cracking or spalling that damages both the aesthetic and structural integrity of the cladding.
  • Biological Growth: Moist environments are ideal for algae, fungi, and moss growth. This growth discolours the sandstone and retains further moisture, increasing the damage over time. The biological layer can make surfaces skiddy, presenting a safety hazard.
  • Efflorescence: As moisture within the sandstone evaporates, it leaves behind salt deposits. These deposits, known as efflorescence, can be tough to remove and may permanently alter the stone’s appearance.
  • Thermal Expansion and Contraction: Humidity can enhance the thermal expansion and contraction of sandstone, especially when combined with temperature fluctuations. This dynamic can accelerate the deterioration process, leading to more frequent and severe cracking and spalling.

To combat these effects, it is essential to treat and maintain sandstone cladding in humid climates with effective moisture management strategies and regular cleaning to prevent biological growth and salt build-up.

Preventive Maintenance

Preventive Maintenance

Effective preventive maintenance is crucial to preserving sandstone cladding in humid climates. The primary goal is to minimize moisture penetration and manage environmental impacts that can degrade the stone. Here are key strategies for maintaining sandstone cladding:

  • Sealing: Apply a high-quality sealant specifically designed for natural stone. This sealant forms a protective barrier that repels water while allowing the stone to breathe. It is essential to reapply sealant periodically, following manufacturer recommendations, usually every two to five years.
  • Proper Installation: Ensure that sandstone cladding is installed with adequate drainage systems to prevent water accumulation. The back of the cladding should include a ventilated cavity that allows any absorbed moisture to evaporate and air to circulate, reducing the risk of water damage.
  • Regular Cleaning: Clean the cladding regularly using gentle methods such as soft brushing or low-pressure washing to remove dirt, debris, and biological growth. Avoid harsh chemicals or high-pressure washers, which can damage the sandstone.
  • Routine Inspections: Conduct visual inspections regularly to identify early signs of moisture-related damage such as discoloration, algae growth, or salt deposits. Early detection can prevent minor issues from becoming severe, reducing long-term repair costs.

Cleaning and Maintenance Routine

Cleaning and Maintenance Routine

Establishing a thorough cleaning and maintenance routine is essential for preserving sandstone cladding in humid climates. Here’s a detailed approach:

  • Scheduled Cleaning: Conduct biannual cleaning sessions to remove accumulated dirt, debris, and biological growth. Use soft brushes and mild, pH-neutral cleaners specifically formulated for natural stone. Avoid acidic solutions and high-pressure washing, which can erode the surface of the sandstone.
  • Spot Cleaning: Between scheduled cleanings, perform spot cleaning as needed to address stains or biological growth like moss and algae. Use a soft cloth or sponge with a stone-safe cleaning solution. For stubborn stains, a poultice may be applied to draw out the discoloration.
  • Sealing: After cleaning, allow the sandstone to dry completely, then apply a breathable sealant to protect against moisture penetration. This should be done every two to five years, depending on the exposure and manufacturer’s recommendations.
  • Inspection: Regularly inspect the cladding for signs of damage such as cracks, loose pieces, or efflorescence. Early detection and repair of these issues can prevent more extensive damage and costly repairs.
  • Documentation: Keep a log of all maintenance activities, including dates, products used, and observations. This record can help track the condition of the cladding over time and optimize the maintenance schedule.. 

Sealing and Protective Measures

Sealing and Protective Measures

Implementing effective sealing and protective measures is vital for safeguarding sandstone cladding against the adverse effects of humidity. Here are essential steps to ensure optimal protection:

  • Choosing the Right Sealant: Select a high-quality sealant that is specifically designed for natural stone, particularly sandstone. The sealant should provide a breathable, moisture-resistant barrier without trapping moisture within the stone, which could cause further damage.
  • Application Process: The application of the sealant should occur after thorough cleaning and complete drying of the sandstone surface. Apply the sealant evenly using a brush, roller, or sprayer, ensuring full coverage. Follow the manufacturer’s instructions regarding the number of coats required and the necessary drying time between applications.
  • Reapplication Schedule: Sealant effectiveness can diminish over time, especially in humid environments. It is generally recommended to reapply sealant every two to five years, but this can vary based on the exposure to moisture and the product used. Regular inspections can help determine when reapplication is necessary.
  • Additional Barriers: In extremely humid areas, consider additional protective measures such as weather barriers behind the cladding to prevent moisture ingress from the back side. Ensure proper installation to allow any trapped moisture to escape and prevent accumulation.

Addressing Efflorescence and Salt Deposits

Addressing Efflorescence and Salt Deposits

Efflorescence and salt deposits are common issues for sandstone cladding in humid environments, arising from salts within the stone migrating to the surface and crystallizing as moisture evaporates. Effectively managing these issues is essential for maintaining the aesthetic and structural integrity of the cladding. Here’s how to address them:

  • Early Detection: Regularly inspect sandstone cladding for the white, powdery residue characteristic of efflorescence. Early detection allows for simpler, more effective removal before the salts penetrate deeply or cause surface pitting.
  • Cleaning Method: To remove efflorescence, use a dry, soft brush to gently scrub the affected areas. For persistent or large-scale deposits, a mild solution of water and vinegar can be used sparingly. After applying the solution, thoroughly rinse the area with clean water to remove any residual acid which could further damage the stone.
  • Preventive Measures: Minimize the recurrence of efflorescence by ensuring that the cladding is properly sealed with a breathable sealant that prevents moisture ingress yet allows vapor to escape. Additionally, improve drainage and ventilation around the cladding to reduce moisture accumulation.
  • Regular Maintenance: Incorporate the cleaning of salt deposits into the regular maintenance schedule for the cladding. Keeping the stone clean and dry as much as possible is key to preventing the formation of new efflorescence.

Dealing with Mold, Mildew, and Algae Growth

Mold, mildew, and algae growth are common issues for sandstone cladding in humid climates due to the stone’s natural porosity, which allows moisture retention. These organisms not only mar the aesthetic appeal of the cladding but can also cause structural damage over time. Here’s how to effectively manage these problems:

  • Regular Cleaning: Establish a routine cleaning schedule using a soft brush and a solution of mild, pH-neutral soap mixed with water. This will help remove any existing growth and prevent new spores from taking hold.
  • Targeted Treatments: For areas heavily affected by mold, mildew, or algae, apply a cleaning solution formulated for killing these organisms. Ensure the product is safe for use on sandstone to avoid damaging the stone. Apply the solution according to the manufacturer’s directions, typically allowing it to sit on the surface for a period before rinsing thoroughly with clean water.
  • Improving Ventilation: Enhance air circulation around the cladding to reduce moisture accumulation. This can be achieved by trimming vegetation that may block airflow and adjusting landscaping to avoid direct contact with the cladding.
  • Use of Preventive Products: Consider applying a mold inhibitor that is compatible with sandstone after cleaning. This product will provide an additional layer of protection by making the surface less hospitable to mold and algae.

Regular Inspection and Repair

Regular Inspection and Repair

Consistent inspection and timely repair are critical for maintaining the integrity and appearance of sandstone cladding in humid climates. Here’s a focused approach to ensure your cladding remains in top condition:

  • Frequency of Inspections: Conduct visual inspections of the sandstone cladding at least twice a year. Additional checks should follow any severe weather events that could exacerbate existing issues or introduce new vulnerabilities.
  • What to Look For: During inspections, look for signs of damage such as cracks, loose stones, or areas of discoloration that may indicate moisture penetration. Also, check for efflorescence, mold, or algae growth which can signal excessive moisture retention within the cladding.
  • Immediate Action: If any issues are identified, immediate action is required to prevent further damage. Small cracks and loose pieces should be repaired using appropriate materials and techniques that match the existing cladding. Ensure that any repairs maintain the cladding’s ability to breathe, preventing moisture buildup.
  • Professional Assessment: For extensive damage or complex issues, consult a professional specializing in stone cladding. Their expertise will ensure that repairs are properly executed, which is essential for the longevity and safety of the cladding system.

Conclusion: Proactive Care

Maintaining sandstone cladding in humid climates requires diligence and proactive care. Regularly inspect, clean, seal, and repair your cladding to prevent lasting damage and preserve its beauty.

Don’t wait for visible signs of wear; act now to protect your investment.

Consult a professional for tailored advice and ensure your sandstone remains a testament to timeless elegance.

How to Choose the Right Stone Paving

Choosing the right stone paving is daunting due to the myriad of materials and styles available.

Make the wrong choice, and you risk paving that fades or cracks, leading to costly replacements.

This article guides you through selecting a durable, aesthetically pleasing stone that complements your outdoor space perfectly.

Assessing Your Stone Paving Needs

Assessing Your Stone Paving Needs

Assessing your stone paving needs effectively involves carefully considering several critical aspects to ensure the choice of material suits both functionality and aesthetics.

  • Purpose of the Paved Area: Identify the function; driveways require durable materials like granite or basalt for high traffic, while decorative stones such as sandstone or limestone are ideal for patios and garden paths.
  • Climate Considerations: Choose appropriate stones for your climate; use frost-resistant granite in areas with severe weather and de-icing needs. For sunny areas, select light-coloured stones that reflect heat and resist UV degradation.
  • Maintenance Needs: Opt for materials that suit your maintenance willingness. Quartzite is low maintenance and durable, while softer stones like marble need regular sealing to prevent stains and wear.
  • Aesthetic Harmony: Match the stone’s colour, texture, and finish with your home’s exterior to ensure visual continuity. Available in various hues and textures, stones can range from sleek, modern finishes to traditional, rustic appearances to suit different architectural styles.

Understanding Paving Stone Types 

Understanding Paving Stone Types 

Understanding the various types of paving stones is crucial for making an informed decision that aligns with both your aesthetic preferences and functional requirements. Here are the main categories:

  • Natural Stone: This category includes granite, limestone, sandstone, and slate, each offering unique patterns and durability levels. Granite is highly durable and available in various colours, making it suitable for high-traffic areas. Limestone provides a more uniform appearance but is softer and requires more maintenance. Sandstone offers a range of colour variations and is relatively easy to work with, while slate is valued for its natural grip and distinct colour layering.
  • Concrete Pavers: These are manufactured to mimic the appearance of natural stone but at a lower cost. Concrete pavers are versatile in colour and shape but may fade over time and require sealing to maintain their appearance.
  • Brick Pavers: Made from clay, brick pavers offer a traditional look that can blend seamlessly with older or historic properties. They are durable but can vary in colour and finish due to the firing process.
  • Composite Pavers: These are made from recycled plastic and rubber, making them an eco-friendly option. They are lightweight and easy to install, available in a range of colours and styles, and often used in places where drainage and sustainability are concerns.

Evaluating Durability and Maintenance of Paving Stones

Evaluating Durability and Maintenance of Paving Stones

Durability

The longevity of paving stones is influenced by their ability to withstand traffic, weather conditions, and general wear. Granite and basalt are top choices for high-traffic areas due to their hardness and resistance to abrasion. 

Sandstone, while durable, is more porous and may require additional sealing in wet climates to prevent water absorption and weathering. Slate, known for its natural split layers, offers good grip and durability but can be brittle in thinner cuts.

Maintenance

Maintenance needs vary significantly between stone types. Natural stones like limestone and sandstone may require regular sealing to enhance their stain resistance and prevent weather damage. 

Conversely, manufactured options like concrete pavers often need sealing to retain their colour and minimize wear from exposure. Brick pavers generally require less maintenance, only needing occasional cleaning and sealing to preserve their rich colour.

Considering Installation Factors for Paving Stones

Considering installation factors is critical when choosing paving stones, as these affect both the appearance and longevity of your paved area. Here are essential elements to consider:

  • Subbase Preparation: A properly prepared subbase is fundamental to prevent paving from shifting or sinking. Typically, this involves laying a layer of compacted gravel and sand, which provides a stable, level base for the stones. The depth and material of the subbase might vary depending on soil type and drainage needs.
  • Drainage: Effective drainage is crucial to avoid water accumulation that can lead to structural damage or surface wear. Ensure that the installation plan includes a slight slope (typically a 1% grade) away from buildings and towards suitable drainage points. For areas with heavy rainfall, incorporating a permeable paving system could be beneficial, allowing water to percolate through the joints between the stones and into the ground.
  • Laying Technique: The method of laying the stones can impact both the aesthetic outcome and the pavement’s durability. Patterns such as herringbone or interlocking designs not only add visual interest but also enhance the strength and stability of the pavement. Ensure that the stones are evenly laid and that the joints between them are tightly spaced to minimize movement and weed growth.
  • Edge Restraints: Installing edge restraints is a key step to prevent the pavers from drifting apart over time. Materials for edge restraints can range from flexible plastic or metal to more natural options like additional rows of bricks or mortared stone.

Environmental Impact of Paving Stones

Environmental Impact of Paving Stones

The environmental impact of paving stones is a crucial consideration, particularly in terms of sustainability and ecological effects. Here are the primary aspects to consider:

  • Material Sourcing: Quarrying for natural stone can disrupt local ecosystems and cause soil erosion. Choosing locally sourced stones reduces transportation emissions and supports local economies.
  • Manufacturing Process: Concrete and brick pavers require significant energy due to their production processes, which involve high temperatures. Selecting manufacturers that use renewable energy and recycled materials can mitigate these impacts.
  • Permeability: Impermeable surfaces block natural water infiltration, leading to runoff and affecting local waterways. Permeable paving options allow water to pass through, reducing runoff and encouraging groundwater recharge.
  • Durability and Maintenance: Durable materials decrease the need for frequent replacements, reducing long-term environmental impacts. Low-maintenance materials that require fewer chemical treatments also help preserve local air and water quality.

Local Regulations and Restrictions 

Local Regulations and Restrictions 

When choosing the right stone paving in Australia, it’s essential to be aware of local regulations and restrictions, which can vary significantly between states and even local councils. 

Here are some key considerations:

  • Planning Permissions: In some areas, especially in heritage-listed or environmentally sensitive zones, you may need to seek planning permission before commencing any paving projects. This often involves submitting plans that detail the type and scope of the work.
  • Water Runoff Regulations: Many Australian councils have strict regulations regarding stormwater management. These rules ensure that any new paving does not exacerbate local flooding risks by altering natural water flow patterns. In some cases, permeable paving solutions may be required to promote water absorption into the ground.
  • Building Codes: The Australian Building Codes Board (ABCB) sets out standards that include specifications for outdoor paving to ensure safety and accessibility. Compliance with these codes is mandatory to prevent issues like uneven surfaces, which could pose trip hazards.
  • Environmental Considerations: Some localities may have specific regulations aimed at protecting the environment, such as limits on the removal of existing vegetation and requirements for the use of sustainable or recycled materials.

Personal Preferences and Style of Paving Stones

Personal Preferences and Style of Paving Stones

Personal preferences and style play pivotal roles in selecting the right paving stones, as they should harmonize with both your home’s architectural style and your lifestyle needs. Here’s how to align your choices effectively:

  • Colour and Texture: Choose colours that complement or contrast beautifully with the exterior of your home and existing landscaping. Textures vary from smooth, polished surfaces ideal for modern aesthetics to rough, natural finishes that enhance rustic charm.
  • Size and Shape: The size and shape of the paving stones can influence the perceived space and flow of your outdoor areas. Larger pavers tend to make a small space appear bigger, while smaller, intricate designs can add detail and interest to expansive areas.
  • Pattern: Consider how the laying pattern will affect the area’s overall look. Straight lines offer a formal appearance, whereas irregular patterns can create a more organic, relaxed feel.

Conclusion: Making a Decision

Choosing the right stone paving requires a thoughtful balance of durability, maintenance, aesthetics, and installation specifics.

Ready to transform your outdoor space?

Start exploring your options today and pave the way to a beautifully enhanced exterior that meets all your style preferences.

Safe and Effective Ways to Remove Moss and Algae From Limestone

To ensure your marble surfaces retain their pristine appearance, adopt a routine that combines regular care with the right polishing approach. 

Whether you choose DIY methods for light maintenance or seek professional expertise for more severe conditions, prioritize the preservation of your marble. 

Remember, investing in proper care today safeguards the splendour of your surfaces for years to come.

Understanding Moss and Algae Growth on Limestone

Understanding Moss and Algae Growth on Limestone

Moss and algae growth on limestone surfaces is a common issue, particularly in moist and shaded environments. Understanding the conditions that foster this growth is essential for effective prevention and removal.

  • Moisture and Shade: Limestone, being a porous stone, readily absorbs moisture. This characteristic, combined with limited sunlight, creates an ideal environment for moss and algae. Areas that are frequently damp, such as those near downspouts, in shady gardens, or north-facing walls, are particularly susceptible.
  • Nutrient Deposits: Moss and algae thrive not only on moisture but also on nutrients. These can accumulate on limestone from organic debris like leaves and twigs, or from environmental pollutants. As these materials decay, they release nutrients that feed moss and algae, promoting their growth.
  • Air Quality: Poor air quality can accelerate the growth of moss and algae on limestone. Pollutants like sulfur dioxide can interact with the stone, altering its chemistry and making it more hospitable to growths.

Understanding these factors is crucial for tackling the problem effectively. By controlling moisture, reducing nutrient buildup, and improving air quality around limestone surfaces, you can significantly diminish the prevalence of moss and algae, maintaining the aesthetic and structural integrity of the stone.

Precautions and Safety Measures

Precautions and Safety Measures

When removing moss and algae from limestone, it’s crucial to undertake precautions to ensure both the safety of the individual performing the task and the preservation of the limestone itself.

  • Chemical Use: If you opt for chemical cleaners, choose products specifically designed for use on limestone to prevent etching or discoloration of the stone. Always wear gloves and protective eyewear to avoid skin and eye irritation from chemical splashes.
  • Physical Removal: For mechanical removal methods, such as scraping or using a stiff brush, proceed with caution. Use soft-bristled brushes rather than metal tools, which can scratch limestone surfaces. Gentle brushing minimizes damage to the stone while effectively dislodging moss and algae.
  • Pressure Washing: While pressure washing can be effective, it must be done carefully. High pressure can erode limestone. Always use the lowest effective setting and keep the nozzle at least 12 inches away from the surface. Test on a small, inconspicuous area first to ensure it doesn’t damage the stone.
  • Environmental Considerations: Be mindful of runoff when using chemicals or large amounts of water, as it can affect surrounding vegetation and water sources. Always follow local regulations regarding chemical use and disposal.

By following these safety measures and precautions, you can effectively remove moss and algae from limestone without compromising the stone’s integrity or your safety.

Moss and Algae Manual Removal Methods From Limestone

Moss and Algae Manual Removal Methods From Limestone

Manual removal of moss and algae from limestone is a safe and effective method, especially suitable for delicate surfaces or small areas. Here’s how to approach it:

  • Brushing: Start with a dry, stiff-bristled brush to scrape off as much of the moss and algae as possible. This method is purely mechanical and avoids the use of chemicals, making it environmentally friendly and safe for the limestone. Ensure the brush is not metallic to avoid scratching the surface.
  • Scraping: For tougher patches where a brush might not suffice, use a plastic scraper. It’s critical to use gentle pressure to prevent gouging the stone. Scraping is more direct than brushing and can remove more stubborn growths.
  • Boiling Water: Pouring boiling water directly onto the moss and algae can help loosen their hold on the limestone. After application, let the area sit for a few minutes before scrubbing with the brush. This method enhances the effectiveness of mechanical removal without introducing chemicals.
  • Regular Maintenance: Regularly sweeping and keeping limestone dry reduces moss and algae buildup. Ensure proper drainage around limestone installations to prevent water from pooling.

By employing these manual methods, you can maintain the integrity and appearance of limestone surfaces without the risks associated with harsh chemicals or abrasive techniques.

Moss and Algae Chemical Removal Options

Moss and Algae Chemical Removal Options

When choosing chemical methods to remove moss and algae from limestone, it’s essential to select appropriate solutions that ensure efficacy without harming the stone or the environment.

  • Appropriate Chemicals: Opt for pH-neutral or alkaline-based cleaners specifically designed for limestone. Acidic solutions, like vinegar or bleach, can damage limestone, causing pitting and discoloration. Products containing ammonium bifluoride are also advisable to avoid.
  • Application: Apply the chosen cleaner according to the manufacturer’s instructions. Typically, you would dilute the solution (if required), apply it to the affected areas, and allow it to sit for the prescribed time—usually between 10 to 30 minutes. This dwell time is crucial for the chemical to break down the biological growth.
  • Safety Gear: Wear protective gloves, goggles, and suitable clothing to protect your skin and eyes from splashes, as chemical cleaners can be irritant.
  • Rinsing: After the treatment time has elapsed, thoroughly rinse the limestone with clean water to remove all chemical residues. This step is critical to prevent any long-term damage to the stone.
  • Environmental Considerations: Be mindful of runoff when using chemicals. Prevent the solution from entering nearby soil or water bodies, as it can harm vegetation and aquatic life. Always follow local regulations for chemical use and disposal.

By carefully selecting and applying chemical agents, you can effectively remove moss and algae from limestone surfaces while preserving both the stone’s integrity and the surrounding environment.

Natural Remedies for Moss and Algae Removal From Limestone

Natural remedies offer a gentle yet effective approach to removing moss and algae from limestone, minimizing the risk of damage to the stone and the environment.

  • Boiling Water: A simple and immediate method is to pour boiling water over the affected areas. The high temperature helps to kill moss and algae, making them easier to brush away. This method requires caution to avoid burns and ensure complete coverage of the area.
  • Salt Solution: Mixing a strong saltwater solution can also be effective. Dissolve a cup of salt in a gallon of water, apply it to the moss and algae, and leave it to dry. Salt dehydrates and kills these growths. However, be mindful of the surrounding vegetation, as salt can harm plants and soil health.
  • Baking Soda: Sprinkling baking soda directly on moss and algae spots is another eco-friendly option. Baking soda is mildly abrasive and creates an inhospitable environment for growths due to its alkaline nature. After application, leave it for a few days before scrubbing off with a brush.

These natural methods are safe for limestone and are ideal for those seeking eco-friendly solutions. Regular application and maintenance can prevent the recurrence of moss and algae, preserving the natural beauty of limestone surfaces.

Moss and Algae Application Techniques

Moss and Algae Application Techniques

Effectively applying treatments to remove moss and algae from limestone requires precise techniques to ensure thorough coverage and prevent damage to the stone.

  • Preparation: Before any application, clear the limestone surface of loose debris using a soft brush. This helps the treatment adhere directly to the moss and algae, enhancing effectiveness.
  • Direct Application: When using liquids, whether chemical solutions or natural remedies, use a spray bottle or a garden sprayer for even distribution. This method minimizes runoff and ensures that the solution penetrates the porous surfaces of the limestone. Spray in a consistent, sweeping motion to cover all affected areas thoroughly.
  • Dwell Time: Allow the solution to sit on the surface according to the instructions specific to the chosen treatment. This dwell time is crucial for the solution to penetrate and act on the moss and algae. Avoid letting the solution dry completely, as this can make subsequent rinsing less effective.
  • Scrubbing: After the treatment has set, gently scrub the area with a soft-bristle brush. This action helps to dislodge the weakened moss and algae from the stone’s surface.
  • Rinsing: Finally, rinse the area thoroughly with clean water. A low-pressure hose is ideal for washing away all residues without eroding or saturating the limestone.

These application techniques are designed to maximize the efficiency of moss and algae removal while preserving the integrity of limestone surfaces.

Moss and Algae Post-Removal Maintenance on Limestone

Post-removal maintenance is critical in preventing the recurrence of moss and algae on limestone surfaces. Implementing consistent and effective maintenance strategies ensures the longevity and aesthetic appeal of the limestone.

  • Regular Cleaning: Schedule routine cleaning sessions to remove dirt and organic debris that contribute to moss and algae growth. Use a soft brush or cloth and a pH-neutral cleaner designed for limestone to gently clean the surfaces without damaging them.
  • Moisture Control: Since moisture is a primary factor in the growth of moss and algae, ensure that drainage around limestone installations is optimal. Fix leaks, reroute downspouts, and adjust landscaping to prevent water accumulation near limestone surfaces.
  • Sunlight Exposure: Increase sunlight exposure where possible. Trimming overhanging branches and removing obstructions can reduce shade, drying the limestone more quickly and discouraging the growth of moss and algae.
  • Protective Sealants: Apply a breathable sealant that’s appropriate for limestone. This sealant helps to repel water and contaminants, reducing the likelihood of moss and algae taking hold. Ensure the sealant is reapplied as per the manufacturer’s recommendations or as needed based on wear and exposure.

By adhering to these post-removal maintenance practices, you can significantly reduce the potential for moss and algae reformation, preserving the pristine condition of limestone surfaces.

Moss and Algae Prevention Strategies

Moss and Algae Prevention Strategies

Effective prevention of moss and algae on limestone is key to maintaining its appearance and structural integrity. Here are strategic approaches to minimize the risk of these growths:

  • Environmental Modification: Adjust the surrounding environment to decrease moisture and increase sunlight exposure. Trim overhanging branches to reduce shade and ensure that limestone surfaces receive adequate sunlight, which helps keep the stone dry and less hospitable to moss and algae.
  • Improved Drainage: Ensure proper drainage around limestone installations. Slope the ground away from limestone surfaces to prevent water accumulation. Clean gutters and downspouts regularly to avoid overflow and water spillage that could seep into limestone areas.
  • Routine Cleaning: Regularly sweep and clean limestone surfaces to remove organic materials such as leaves and twigs, which can trap moisture and provide nutrients for moss and algae. Use a pH-neutral cleaner suitable for limestone to avoid chemical damage.
  • Use of Sealants: Consider applying a high-quality sealant that is specifically formulated for limestone. This can create a barrier that resists water penetration and helps prevent the adherence of moss and algae spores to the stone surface.

By integrating these strategies, you can effectively prevent the growth of moss and algae, ensuring your limestone remains clean and attractive while avoiding the need for frequent intensive cleaning.

Conclusion: Encouragement for  Long-Term Limestone Protection

In conclusion, maintaining your limestone free from moss and algae involves thoughtful prevention, proper cleaning techniques, and regular maintenance. 

Adopt these practices to ensure your limestone surfaces remain pristine and durable. 

Start protecting your stone today; the longevity and beauty of your limestone depend on your proactive care.

Maximizing the Lifespan of Your Outdoor Sandstone Features

Outdoor sandstone features can deteriorate quickly if not properly maintained, losing their aesthetic appeal.

Factors like weather exposure, moisture, and wear take a toll, causing fading, staining, and erosion.

This article offers expert advice on maximizing the lifespan of your sandstone through effective maintenance strategies. Discover how simple practices can protect and rejuvenate your sandstone, keeping it vibrant and durable for years to come.

Understanding Outdoor Sandstone Characteristics

Understanding Outdoor Sandstone Characteristics

Sandstone is a sedimentary rock composed primarily of sand-sized mineral particles or rock fragments. Here are some critical characteristics to consider:

  • Porosity: Sandstone is notably porous, allowing it to absorb water and other fluids. This characteristic makes it susceptible to weathering and erosion, particularly in environments with freeze-thaw cycles or heavy rainfall.
  • Color Variability: Sandstone comes in a variety of colors, including browns, reds, yellows, and grays, depending on the minerals it contains. While this range offers great versatility in design, the lighter colors may show stains more readily, which can affect maintenance strategies.
  • Strength and Durability: While generally durable, the strength of sandstone can vary significantly based on its composition and the cementing material binding the grains. Stones with quartz cement are typically harder and more weather-resistant than those cemented by clay.
  • Texture and Finish: Sandstone’s texture can range from smooth to gritty, depending on its grain and cement composition. The surface can be left natural, honed, or polished; however, smoother finishes may require more frequent maintenance to retain their appearance.

Choosing the Right Type of Outdoor Sandstone

Choosing the Right Type of Outdoor Sandstone

Here’s how to select the best sandstone for your outdoor environment:

  • Density and Absorption: Opt for denser sandstone varieties, as these are less porous and more resistant to water absorption, minimizing the risk of weathering and erosion over time. High-density sandstones like quartzitic sandstone are more durable against the elements, making them suitable for areas with severe weather conditions.
  • Color Consistency: Consider the consistency of the stone’s color and how it complements your outdoor space. Sandstone colors range from whites and creams to deeper reds and browns. Darker colors may retain more heat, which can be a factor in very sunny areas.
  • Finish Type: The surface finish of sandstone affects both its look and maintenance needs. A honed or polished finish might require more care to maintain its appearance but will offer a modern and sophisticated look. Rough-textured finishes are more forgiving with stains and wear but may require regular cleaning to prevent dirt buildup.
  • Grain Size: The size of the grains in the sandstone can affect its overall strength and aesthetic. Coarser grains typically provide a rustic appearance, while finer grains are better for a sleek, smooth look.

Proper Installation Techniques for Outdoor Sandstone

Proper Installation Techniques for Outdoor Sandstone

Proper installation is essential for maximizing the lifespan of outdoor sandstone features. Here are critical techniques to ensure a durable and stable installation:

Foundation Preparation

Start with a solid foundation. Ensure that the sub-base is well-compacted and level. A mixture of gravel and sand is typically used for the base, providing adequate drainage and stability. The depth of the base should be adjusted based on the load it will bear and the local soil conditions.

Drainage Considerations

Good drainage is crucial to prevent water retention, which can lead to freeze-thaw damage in colder climates. Install the sandstone so that it slopes away from structures to facilitate water runoff. In areas with heavy rainfall, consider incorporating a drainage system beneath the stone to help manage excess water.

Mortar and Jointing

Use a flexible mortar suitable for outdoor and possibly freeze-thaw conditions. 

Mortar should be applied evenly to avoid air pockets, which can cause water to accumulate and weaken the structure. For paving, ensure joints between the stones are filled with sand or a jointing compound that allows for some movement without cracking.

Sealing

Although not always necessary, applying a sealant can protect the sandstone from stains and reduce porosity, enhancing its resistance to weathering. Choose a breathable sealant that won’t trap moisture inside the stone.

Regular Cleaning and Maintenance of Outdoor Sandstone

Regular Cleaning and Maintenance of Outdoor Sandstone

Here’s a detailed guide on how to keep your sandstone in top condition:

  • Routine Cleaning: Regularly sweep or rinse your sandstone to remove debris, dirt, and leaves that can accumulate and cause staining. For a deeper clean, use a mild detergent mixed with water and a soft brush to gently scrub the surface. Avoid using harsh chemicals or pressure washers, which can erode the stone’s surface.
  • Stain Management: Address spills and stains immediately to prevent them from setting in. Organic stains from leaves or berries can be cleaned with a solution of 12% hydrogen peroxide and a few drops of ammonia. Oil-based stains may require a poultice to draw out the oil from the pores of the stone.
  • Sealing: Consider sealing sandstone to enhance its resistance to weathering and staining. A breathable sealant is ideal as it allows moisture within the stone to evaporate. Reapply sealant every two to five years, depending on exposure to weather elements and foot traffic.
  • Regular Inspections: Periodically inspect your sandstone for signs of wear or damage, such as chipping or cracking. Early detection of minor issues can prevent more significant problems down the line.

Protecting Outdoor Sandstone Against Weathering and Environmental Damage

Protecting Outdoor Sandstone Against Weathering and Environmental Damage

Protecting outdoor sandstone from weathering and environmental damage is vital for preserving its structural integrity and aesthetic. Here are effective strategies:

  • Sealing: Apply a high-quality sealant to create a protective barrier against moisture, which is a primary cause of weathering. Sealants help prevent the penetration of water and pollutants, reducing the risk of erosion and staining. Opt for a breathable sealant to allow trapped moisture to escape, preventing damage from within.
  • Positioning: Consider the placement of sandstone features. Avoid areas where water pools or where they are directly exposed to harsh weather elements. Use strategic landscaping to divert water away from the sandstone and provide shade to minimize exposure to intense sunlight.
  • Regular Maintenance: Keep the sandstone clean from organic materials like leaves and twigs, which can retain moisture and cause staining. Periodically check for and repair any cracks or chips that could allow water ingress, exacerbating freeze-thaw cycles and erosion.

Preventing Biological Growth on Outdoor Sandstone

Preventing Biological Growth on Outdoor Sandstone

Preventing biological growth, such as moss, algae, and lichen, on outdoor sandstone is essential to maintain both its appearance and structural integrity. Here are targeted strategies to help you manage this issue:

  • Regular Cleaning: Keep the sandstone clean and free of debris. Use a soft brush and a solution of mild detergent and water to gently clean the stone. This routine helps prevent spores from taking hold and thriving on the surface.
  • Improve Drainage: Ensure that the area around your sandstone features has good drainage. Stagnant water encourages the growth of moss and algae. If necessary, adjust the landscaping to promote better water runoff away from the stone surfaces.
  • Sun Exposure: Whenever possible, allow for maximum sun exposure to the sandstone areas. Sunlight is a natural deterrent to moss and algae growth because these organisms typically thrive in damp, shaded conditions.
  • Use of Fungicides: For persistent biological growth, consider the application of a fungicide designed for use on stone. Choose a product that is safe for sandstone and apply according to the manufacturer’s instructions to avoid discoloration or damage to the stone.
  • Sealing: Apply a breathable sealant that includes anti-fungal properties to help prevent spores from penetrating the porous stone and establishing growth

Avoiding Harsh Cleaning Methods of Outdoor Sandstone

Avoiding Harsh Cleaning Methods of Outdoor Sandstone

Preserving outdoor sandstone involves using gentle cleaning methods that protect its porous surface from damage. Harsh cleaning techniques can accelerate erosion and compromise the stone’s natural beauty. Here’s how to safely care for your sandstone:

  • Avoid High-Pressure Washing: High-pressure water jets can erode the surface of sandstone, stripping away its protective layers. Instead, use a garden hose with a gentle spray to wash off dirt and debris.
  • Steer Clear of Acidic Cleaners: Acid-based cleaners, including vinegar and some commercial stone cleaners, can etch sandstone, causing permanent damage. Always use pH-neutral cleaning solutions designed for use on natural stone.
  • Soft Cleaning Tools: Use a soft-bristled brush or sponge for cleaning. Hard brushes or abrasive tools can scratch the sandstone surface, making it more susceptible to staining and weathering.
  • Spot Cleaning Stains: For localized stains, apply a poultice specifically formulated for stone. This method draws out the stain without the need for vigorous scrubbing that might harm the sandstone.
  • Routine Maintenance: Regular, gentle cleaning is preferable to less frequent, more aggressive treatments. This approach helps maintain the stone’s integrity and appearance without exposing it to harsh methods.

Inspecting and Repairing Outdoor Sandstone Damage

Inspecting and Repairing Outdoor Sandstone Damage

Regular inspection and timely repair of outdoor sandstone damage are crucial for maintaining its longevity and appearance. Here’s how to effectively manage this:

  • Routine Inspection: Periodically inspect your sandstone features for signs of wear, such as cracks, chips, or erosion. Pay attention to areas prone to water accumulation, as these are more susceptible to damage.
  • Immediate Action: Address any issues promptly to prevent them from worsening. Small cracks or chips can be repaired using a suitable stone epoxy or filler. Ensure the repair material matches the color and texture of the surrounding stone for a seamless finish.
  • Professional Assistance: For extensive damage or structural concerns, seek professional help. Stone restoration experts can assess the damage and recommend appropriate repair methods to restore the sandstone’s integrity.

Conclusion: Enjoying Long-Lasting Outdoor Sandstone Features

With diligent maintenance and proactive care, your outdoor sandstone features can withstand the test of time while retaining their natural beauty. 

Don’t wait until issues arise; take proactive steps now to preserve and protect your investment, ensuring years of enjoyment in your outdoor space.

Eco-Friendly Approaches to Sandstone Walls Care and Maintenance

Maintaining sandstone walls can be a challenge, especially when traditional methods harm the environment. 

Chemical cleaners and harsh treatments not only degrade the stone but also contribute to ecological damage. Homeowners often face the dilemma of choosing between preservation and sustainability. 

However, there’s a better way. By adopting eco-friendly approaches to care and maintenance, we can protect both our sandstone walls and the planet. In this article, we’ll explore sustainable solutions to keep your sandstone walls pristine while minimizing environmental impact.

Sandstone Composition and Vulnerabilities

Understanding Sandstone Composition and Vulnerabilities

Understanding the composition and vulnerabilities of sandstone is crucial for effective care and maintenance. Sandstone is primarily composed of quartz grains, cemented together by various minerals like silica, calcite, or iron oxide

Its porous nature makes it susceptible to water absorption, leading to erosion, staining, and biological growth.

One vulnerability is its sensitivity to acidic substances, which can cause etching and discoloration. Additionally, sandstone can be prone to spalling, especially in freezing climates, where water expands within its pores, causing the surface to flake off.

To mitigate these vulnerabilities, it’s essential to choose cleaning agents with a neutral pH to avoid damaging the stone. 

Sealing the surface with a breathable, water-repellent sealant helps prevent moisture infiltration while allowing the stone to breathe. Regular inspections for signs of damage, such as cracks or efflorescence, enable early intervention and preservation of the sandstone’s integrity.

Eco-Friendly Sandstone Walls Cleaning Methods

Eco-Friendly Sandstone Walls Cleaning Methods
  1. Vinegar Solution: Dilute vinegar with water and apply using a soft brush to remove dirt and stains effectively.
  2. Lemon Juice: Mix lemon juice with water for spot-treating stains or gentle overall cleaning, thanks to its citric acid content.
  3. Baking Soda Paste: Create a paste with water and baking soda to tackle stubborn stains or biological growth, using its abrasive texture for effective cleaning.
  4. Test First: Always test any cleaning solution on a small area to ensure compatibility and avoid damaging the sandstone or the environment.

Preventive Sandstone Walls Maintenance Strategies

Preventive Sandstone Walls Maintenance Strategies
  • Regular Inspection: Conduct regular visual inspections of the sandstone walls to identify any signs of damage. Look for cracks, chips, or efflorescence, which may indicate underlying issues. 
  • Keep Walls Clean: Regularly remove dirt, dust, and organic matter from the surface of the walls. This prevents staining and reduces the likelihood of biological growth such as moss or algae. Use a soft brush or cloth to gently clean the walls without causing abrasion or damage to the stone surface.
  • Vegetation Management: Trim vegetation such as bushes, trees, or vines that grow near the walls. Overhanging branches or dense vegetation can trap moisture against the walls, leading to increased moisture retention and potential damage. Keeping vegetation trimmed helps promote airflow and reduces the risk of structural damage caused by roots or falling branches.
  • Sealant Application: Apply a breathable sealant specifically formulated for natural stone to the surface of the sandstone walls. A breathable sealant helps protect the stone from water infiltration while still allowing moisture to escape, preventing issues such as efflorescence or moisture damage. Follow the manufacturer’s instructions for proper application and reapplication as needed.
  • Avoid Heavy Loads: Avoid placing heavy objects against or on the sandstone walls, as this can exert excessive pressure and lead to structural damage over time. Additionally, avoid leaning ladders or other equipment against the walls, as this can cause scratches or gouges in the stone surface. Be mindful of any activities that could potentially damage the walls and take precautions to prevent them.

Sustainable Repair Practices

Sustainable Repair Practices
  • Eco-Friendly Materials: Use lime-based mortars or natural stone fillers for repairs to reduce environmental impact and ensure compatibility with the sandstone.
  • Thorough Cleaning: Before repairing, clean the damaged area thoroughly to remove debris, ensuring proper adhesion of repair materials. Employ gentle cleaning methods to avoid further harm to the stone surface.
  • Seamless Integration: When applying mortar or filler, strive for a seamless blend with the existing stone to maintain the wall’s aesthetic appeal. Match the color and texture of the repair materials for a cohesive finish.
  • Long-Term Sustainability: Consider the durability and weather resistance of repair materials to minimize the need for future interventions. Opting for sustainable solutions promotes the longevity of sandstone walls while contributing to environmental conservation efforts.

Preservation Through Conservation

Preservation Through Conservation

Preservation through conservation involves protecting natural resources like sandstone walls and their environment sustainably, ensuring their integrity for future generations while minimizing ecological harm.

  • Habitat Preservation: Maintain a healthy ecosystem around the walls by preserving vegetation and wildlife, reducing susceptibility to environmental stressors like erosion.
  • Erosion Control Measures: Implement strategies such as retaining walls, erosion-resistant vegetation, and mulching to prevent soil loss around the base of the walls.
  • Limit Human Activity: Reduce disturbances near the walls by establishing designated paths or viewing areas, minimizing trampling of vegetation and soil erosion.
  • Regular Monitoring: Conduct routine inspections to identify signs of degradation or stress, enabling prompt intervention to prevent further deterioration.
  • Conservation Prioritization: By prioritizing conservation practices, homeowners contribute to the preservation of sandstone walls and their natural surroundings for future generations.

Harnessing Renewable Energy for Sandstone Walls Maintenance

Harnessing Renewable Energy for Sandstone Walls Maintenance

Harnessing renewable energy for sandstone wall maintenance offers an eco-friendly approach to power tools and equipment needed for care and upkeep. Solar energy, in particular, presents a viable option for powering electric tools such as pressure washers or lighting systems used during maintenance tasks. 

By installing solar panels on nearby structures, homeowners can tap into clean and sustainable energy sources to reduce reliance on fossil fuels and minimize carbon emissions. 

Additionally, utilizing solar-powered lighting along the walls can enhance visibility during inspections or maintenance activities without increasing energy consumption.

Community Engagement and Collaboration

Community Engagement and Collaboration

Community engagement and collaboration play a vital role in promoting eco-friendly approaches to sandstone wall care and maintenance. Establishing partnerships with local community organizations, conservation groups, or governmental agencies can provide valuable resources and support for preservation efforts. 

Hosting workshops, seminars, or volunteering events allows community members to learn about sustainable practices and participate in hands-on conservation activities.

Furthermore, engaging with neighboring property owners fosters a sense of shared responsibility for the preservation of sandstone walls and their surrounding environment.

Collaborating on maintenance projects, sharing resources, or coordinating efforts for erosion control can enhance the effectiveness of conservation initiatives.

Community involvement also promotes awareness and appreciation of the cultural and historical significance of sandstone walls, fostering a collective commitment to their protection and preservation for future generations. 

Monitoring and Evaluation of Sandstone Walls

Monitoring and Evaluation of Sandstone Walls

Monitoring and evaluation are essential aspects of sandstone walls care and maintenance to ensure their long-term preservation. 

Regular monitoring involves inspecting the walls for signs of damage, deterioration, or environmental stressors such as erosion or biological growth. 

This includes visually assessing the condition of the stone surface, checking for cracks, chips, or discoloration, and identifying any areas in need of repair or intervention.

Evaluation involves analyzing the effectiveness of maintenance strategies and identifying areas for improvement.

This may include assessing the performance of cleaning methods, sealants, or repair materials in terms of their durability, compatibility with the sandstone, and environmental impact.

Additionally, evaluating the success of erosion control measures or conservation efforts helps refine future conservation strategies and optimize resource allocation.

Conclusion

Embracing eco-friendly practices is paramount for preserving sandstone walls and our environment. Let’s commit to sustainable cleaning methods, habitat conservation, and community collaboration. Together, we can safeguard these historical treasures for future generations. Take action today to ensure the longevity of our sandstone heritage.

Please fill your details to download.


      Request Callback


        Enquiry Form